 SurfSense Docs
Google (Drive, Gmail, Calendar)
Set up one Google OAuth app for the Drive, Gmail, and Calendar connectors
One Google Cloud OAuth app powers Google login and all three Google connectors:
- Google Drive — import Drive files into your knowledge base via the Documents sidebar's Import menu
- Gmail — the agent can search, read, draft, and send emails
- Google Calendar — the agent can search and manage your events
This setup is only needed on self-hosted deployments. On SurfSense Cloud, just click Connect.
The redirect URIs below use http://localhost:3929 — the default public URL of a Docker install. If you run SurfSense manually, use your backend URL (http://localhost:8000); in production, use your public domain.
Step 1: Create a Google Cloud Project
- Navigate to the Google Cloud Console
- Select an existing project or create a new one
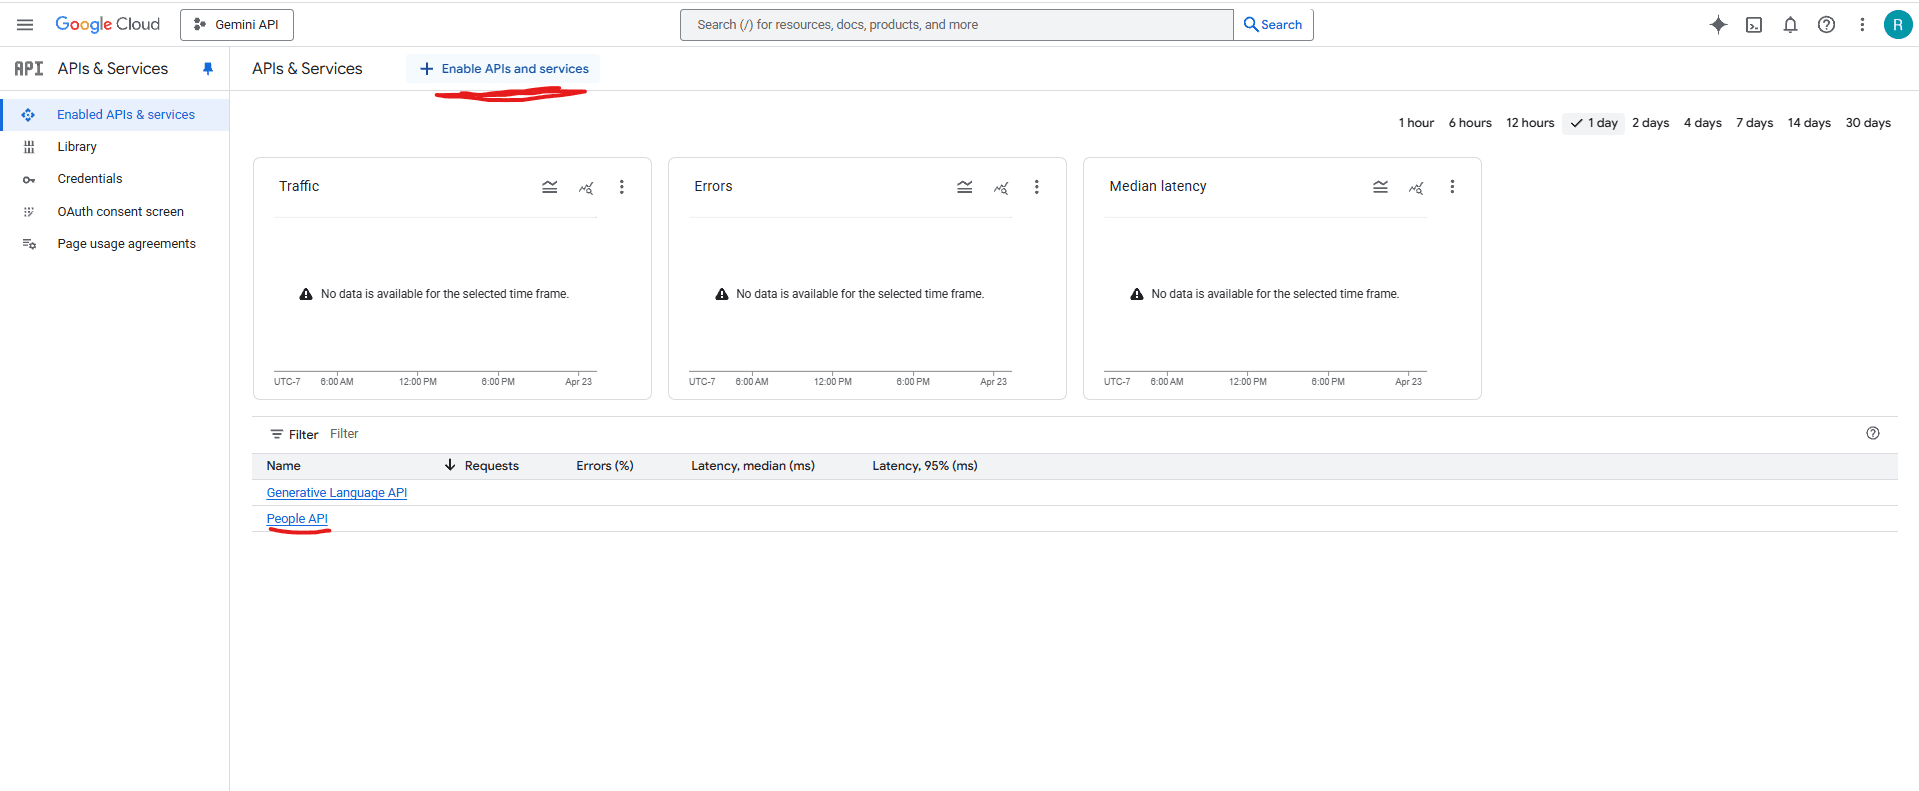
Step 2: Enable the APIs
- Go to APIs & Services > Library
- Search for and enable:
- People API (required for Google OAuth itself)
- Google Drive API (for the Drive connector)
- Gmail API (for the Gmail connector)
- Google Calendar API (for the Calendar connector)
You only need to enable the APIs for the connectors you plan to use — the People API is always required.
Step 3: Configure the OAuth Consent Screen
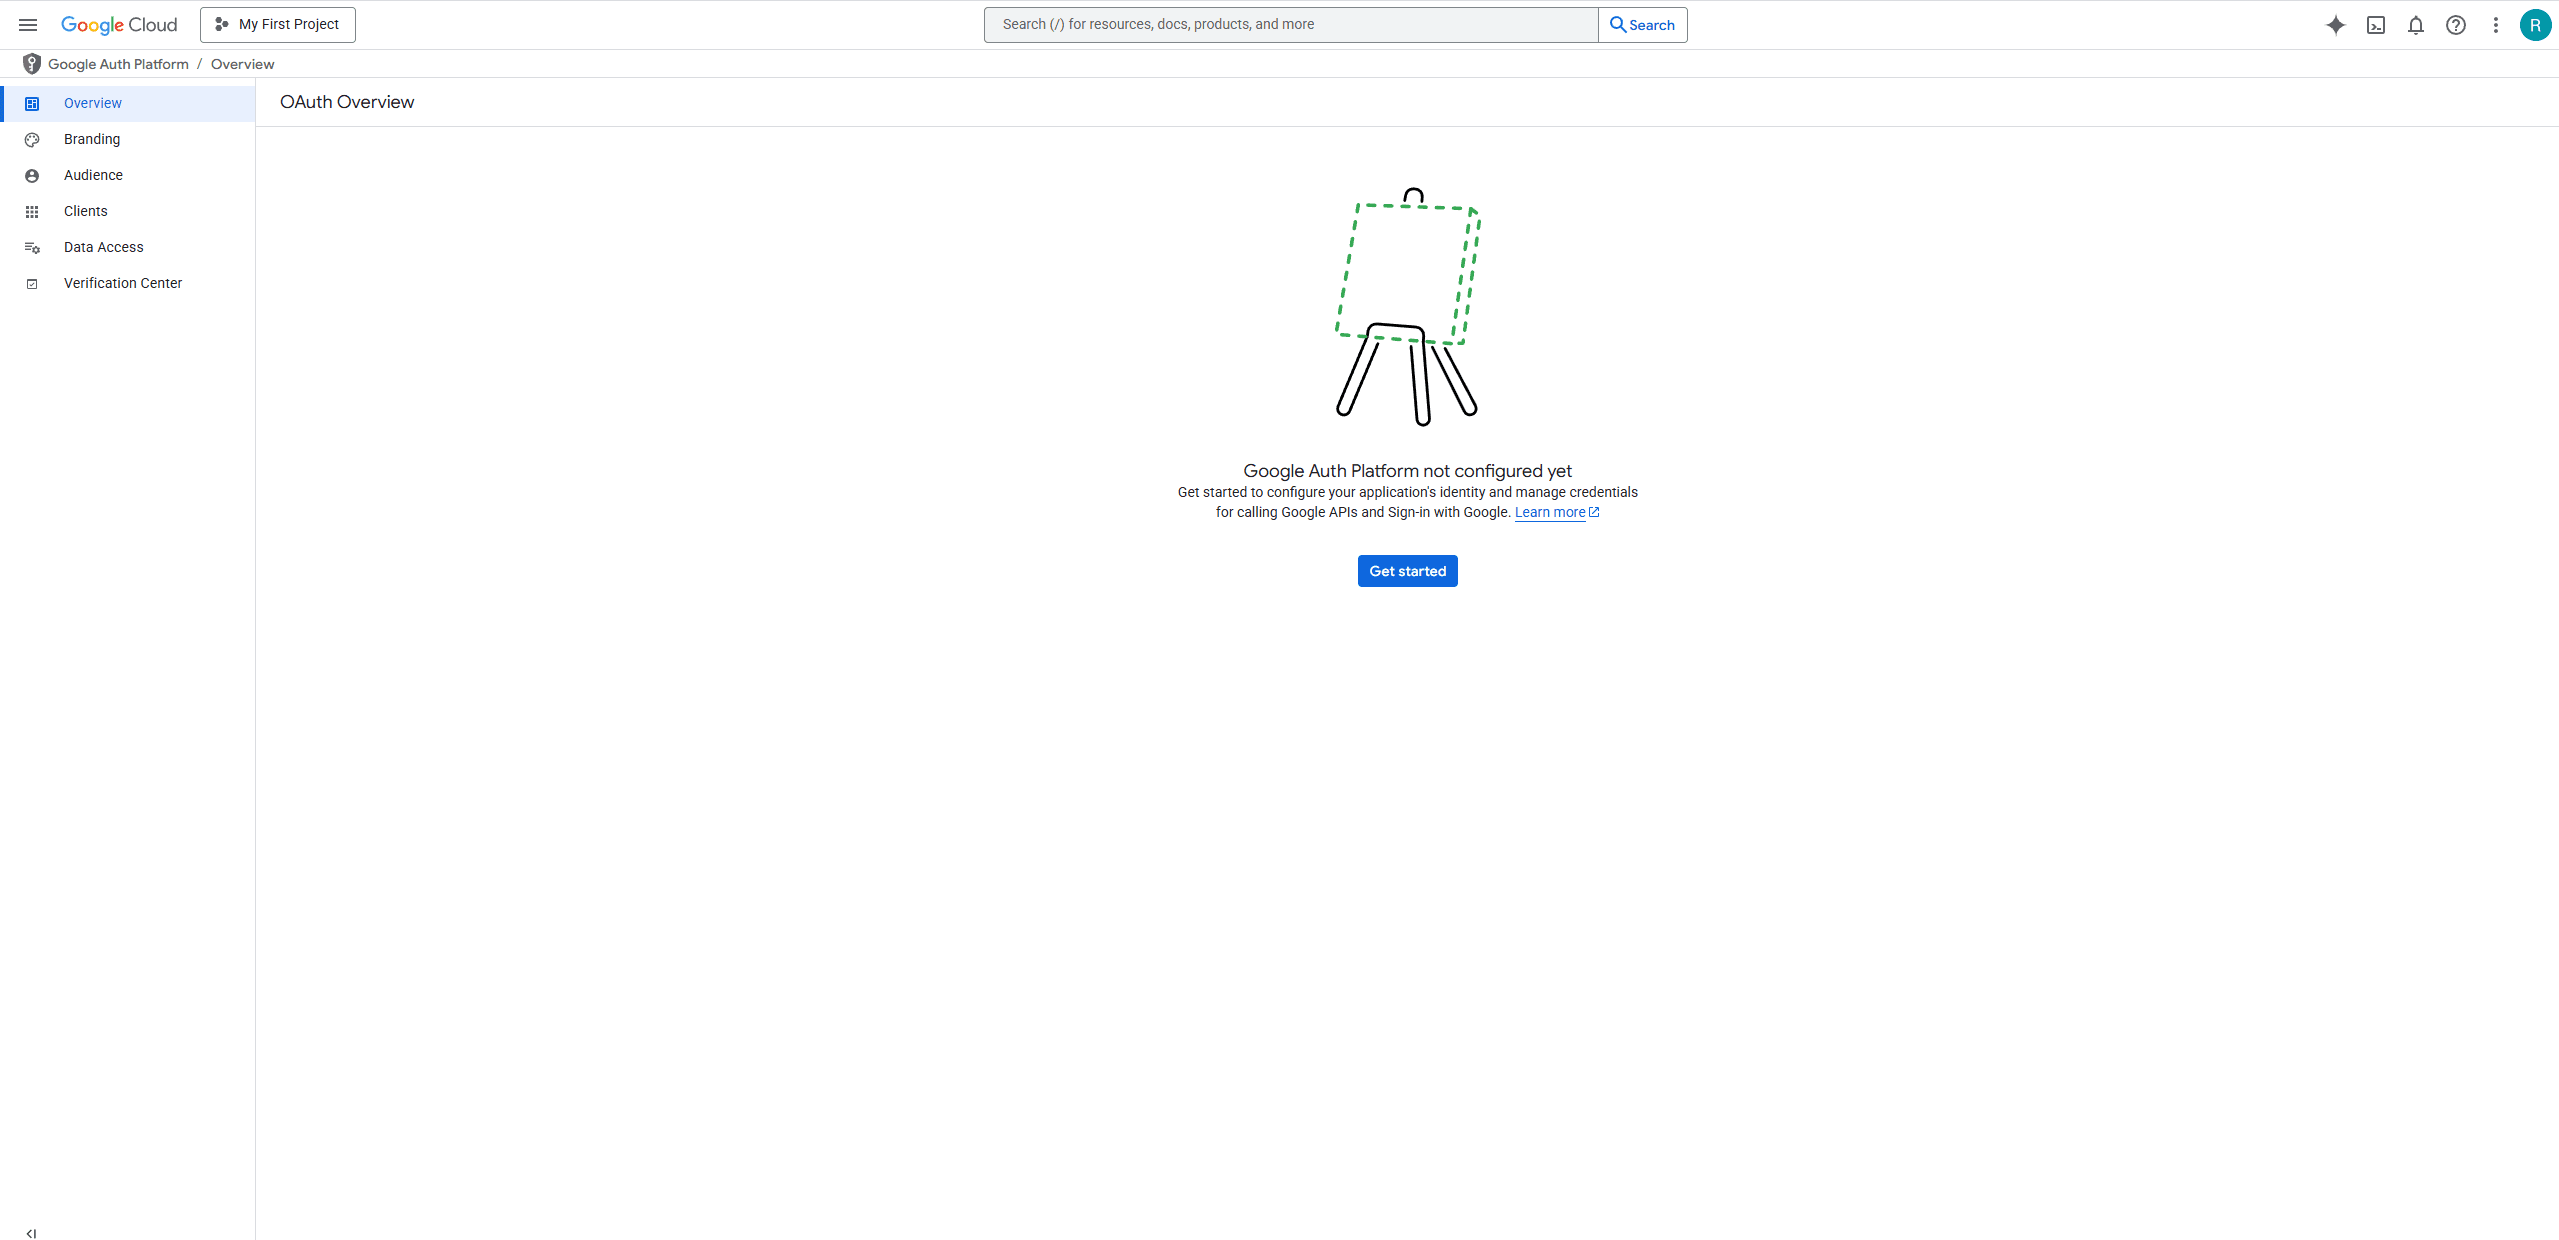
- Go to APIs & Services > OAuth consent screen
- Select External user type (or Internal if using Google Workspace)
- Fill in the required information:
- App name:
SurfSense - User support email: Your email address
- Developer contact information: Your email address
- App name:
- Click Save and Continue
Add Scopes
Click Add or Remove Scopes and add:
| Scope | Used by |
|---|---|
openid, .../auth/userinfo.email, .../auth/userinfo.profile | All (basic OAuth) |
https://www.googleapis.com/auth/drive | Drive connector |
https://www.googleapis.com/auth/gmail.modify | Gmail connector |
https://www.googleapis.com/auth/calendar.events | Calendar connector |
The write-capable scopes (drive, gmail.modify, calendar.events) are what let the agent create files, send emails, and manage events — always with your confirmation in chat. If you only want read access, use drive.readonly, gmail.readonly, and calendar.readonly instead; the write tools then won't work.
Step 4: Create the OAuth Client
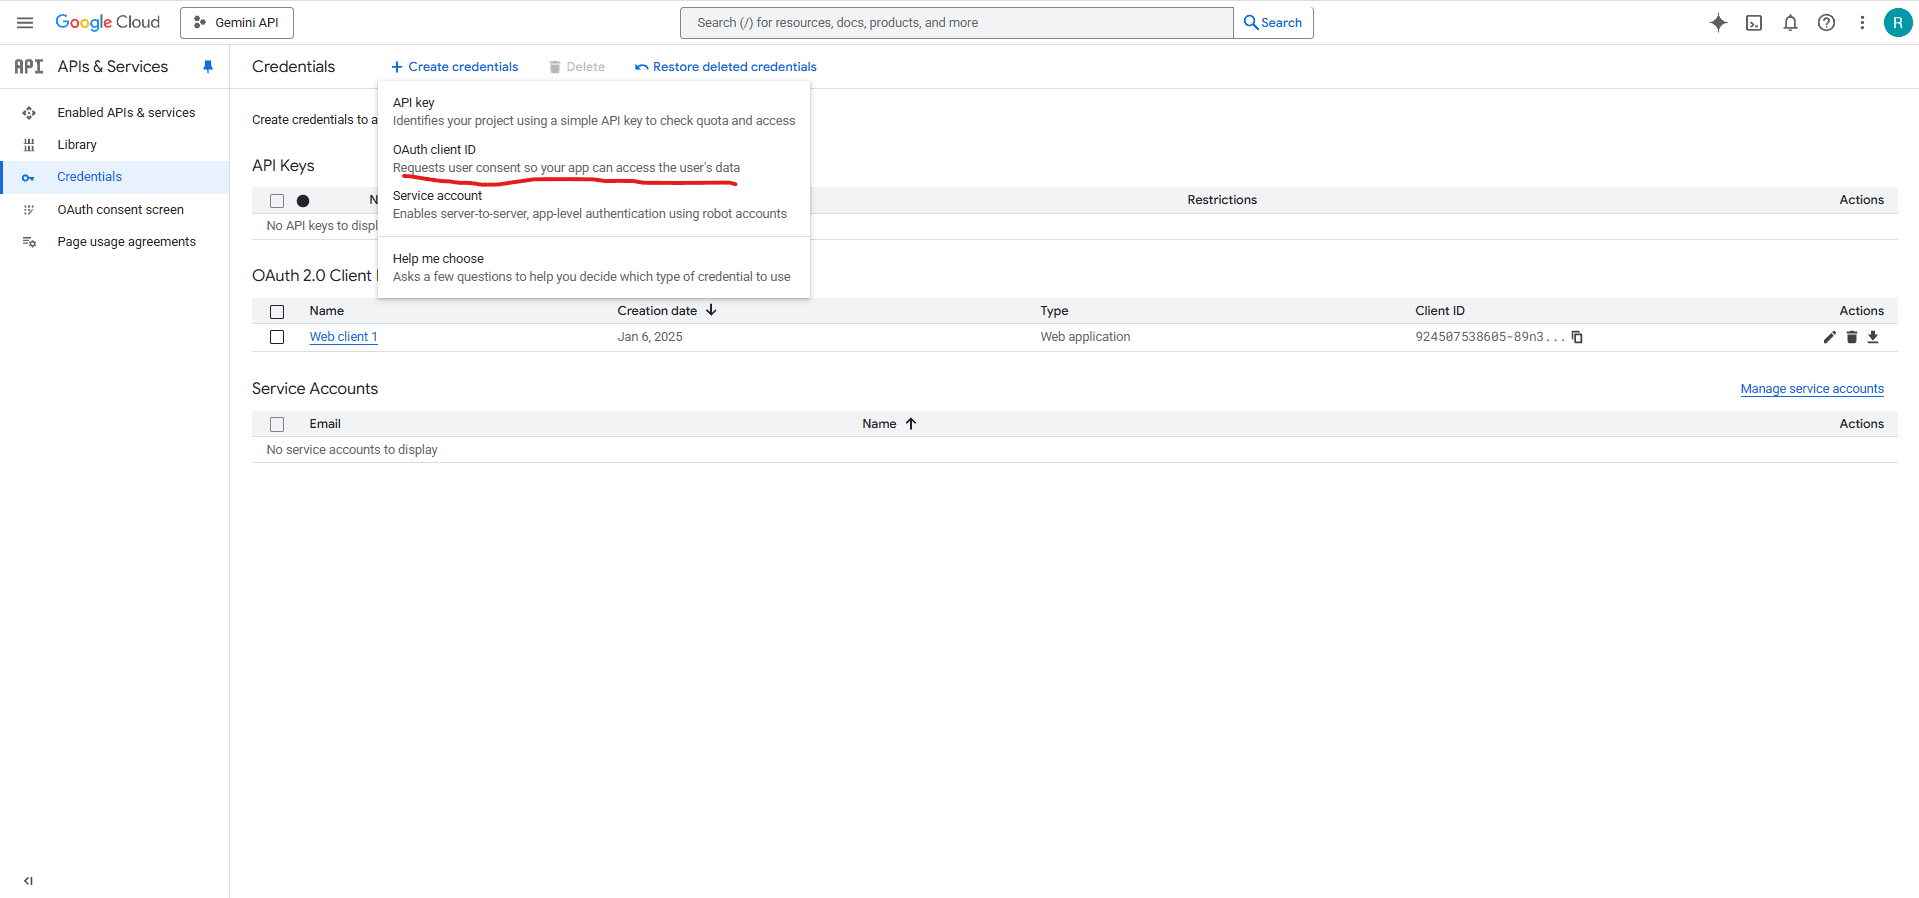
- Go to APIs & Services > Credentials
- Click Create Credentials > OAuth client ID
- Select Web application as the application type
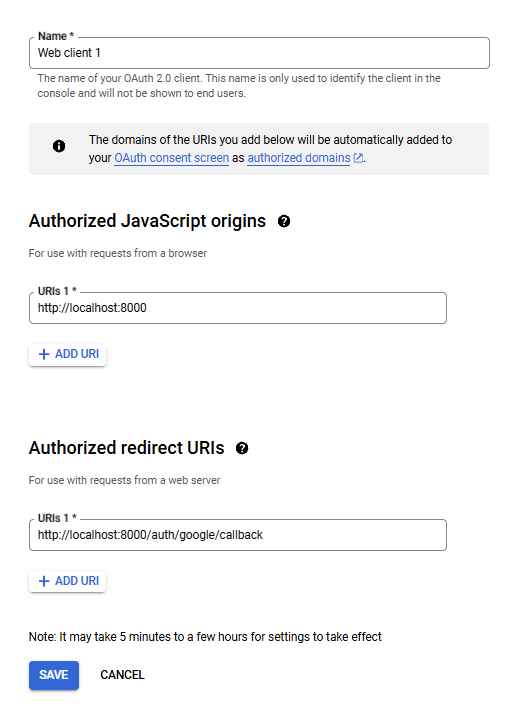
- Enter Name:
SurfSense - Under Authorized redirect URIs, add one URI per connector you plan to use:
http://localhost:3929/api/v1/auth/google/drive/connector/callback
http://localhost:3929/api/v1/auth/google/gmail/connector/callback
http://localhost:3929/api/v1/auth/google/calendar/connector/callback- Click Create
Step 5: Add the Credentials to SurfSense
Copy the Client ID and Client Secret from the confirmation dialog, then add them to your .env file (see the Google section of .env.example for the exact variable names — the same client ID and secret are shared by Google login and all three connectors, plus one redirect URI variable per connector).
Restart SurfSense and the Google connectors are ready to connect:
docker compose up -dNever share your client secret publicly.